Using Tmuxinator with Netkit-JH

Billy Bromell
Billy BromellWhy is Tmuxinator Useful?#
With tmuxinator we can set up a 'project', so that when we are in a lab directory and we run tmuxinator start LABNAME, it will then run lstart for us, and open tmux panes and windows in a configuration we specify, which automatically connect to netkit machine tmux sessions when they are started.
Example:
Result:
- lstart_window
- ab_window
- r_window
Installing#
On Ubuntu 20.04 you can install tmuxinator with:
info
You will also need tmux installed - take a look at the guide for using tmux before using tmux!
Create a Tmuxinator 'Project'#
For this I think it makes sense to have a local project - this will make a file called .tmuxinator.yml in your current working directory, instead of adding the project to a collection in ~/.config/tmuxinator. If we do this in our lab directory, it means that if we share the lab or use source control such as git to track changes, the tmuxinator file will be there.
Let's create a local project:
This will open a template yaml file in your default editor. If you want to edit this again later you can use tmuxinator open --local abr.
We can then start tmuxinator with:
Assuming we didn't make any changes to the yaml file, this start a demo tmuxinator session, which isn't very useful.
Setting Up Windows#
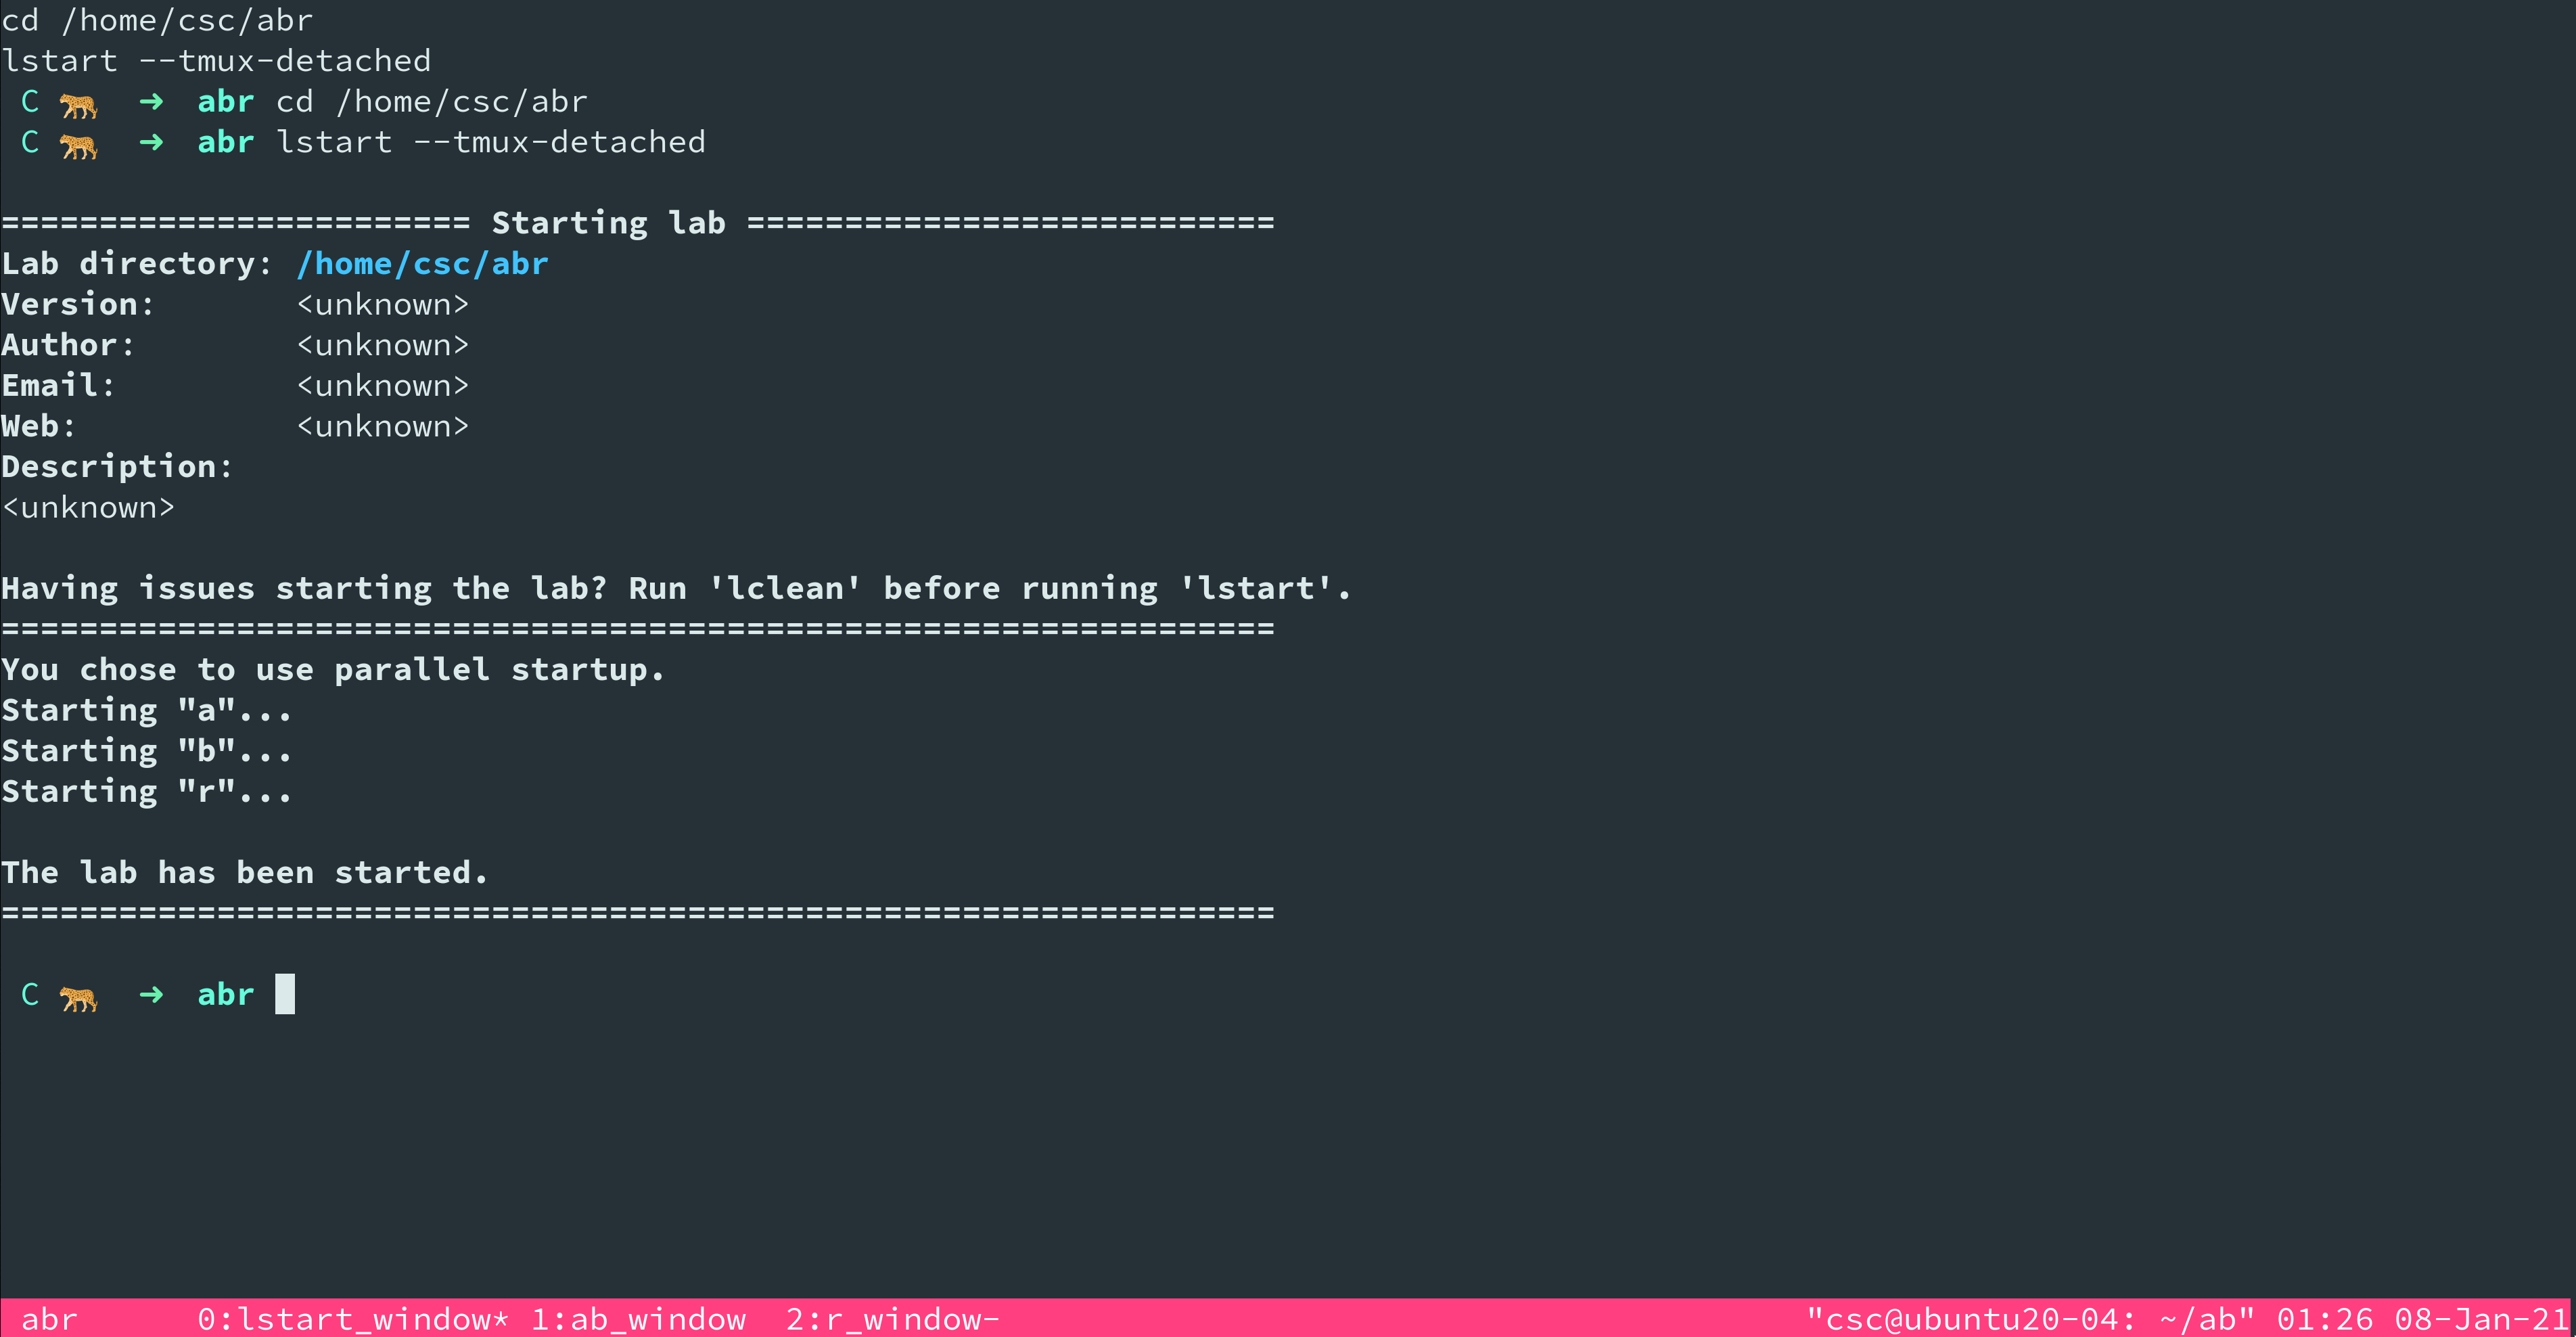
We want tmuxinator to start the lab for us, so somewhere we'll need to run lstart. For example we could do this on the first window.
With this simple config, you can start the lab by typing tmuxinator start abr. This will run lstart --tmux-detached in a window named lstart_window. It looks like the machines have started successfully, but it's not very useful as we can't see our machines. We want to add some panes to display the machines' tmux sessions.
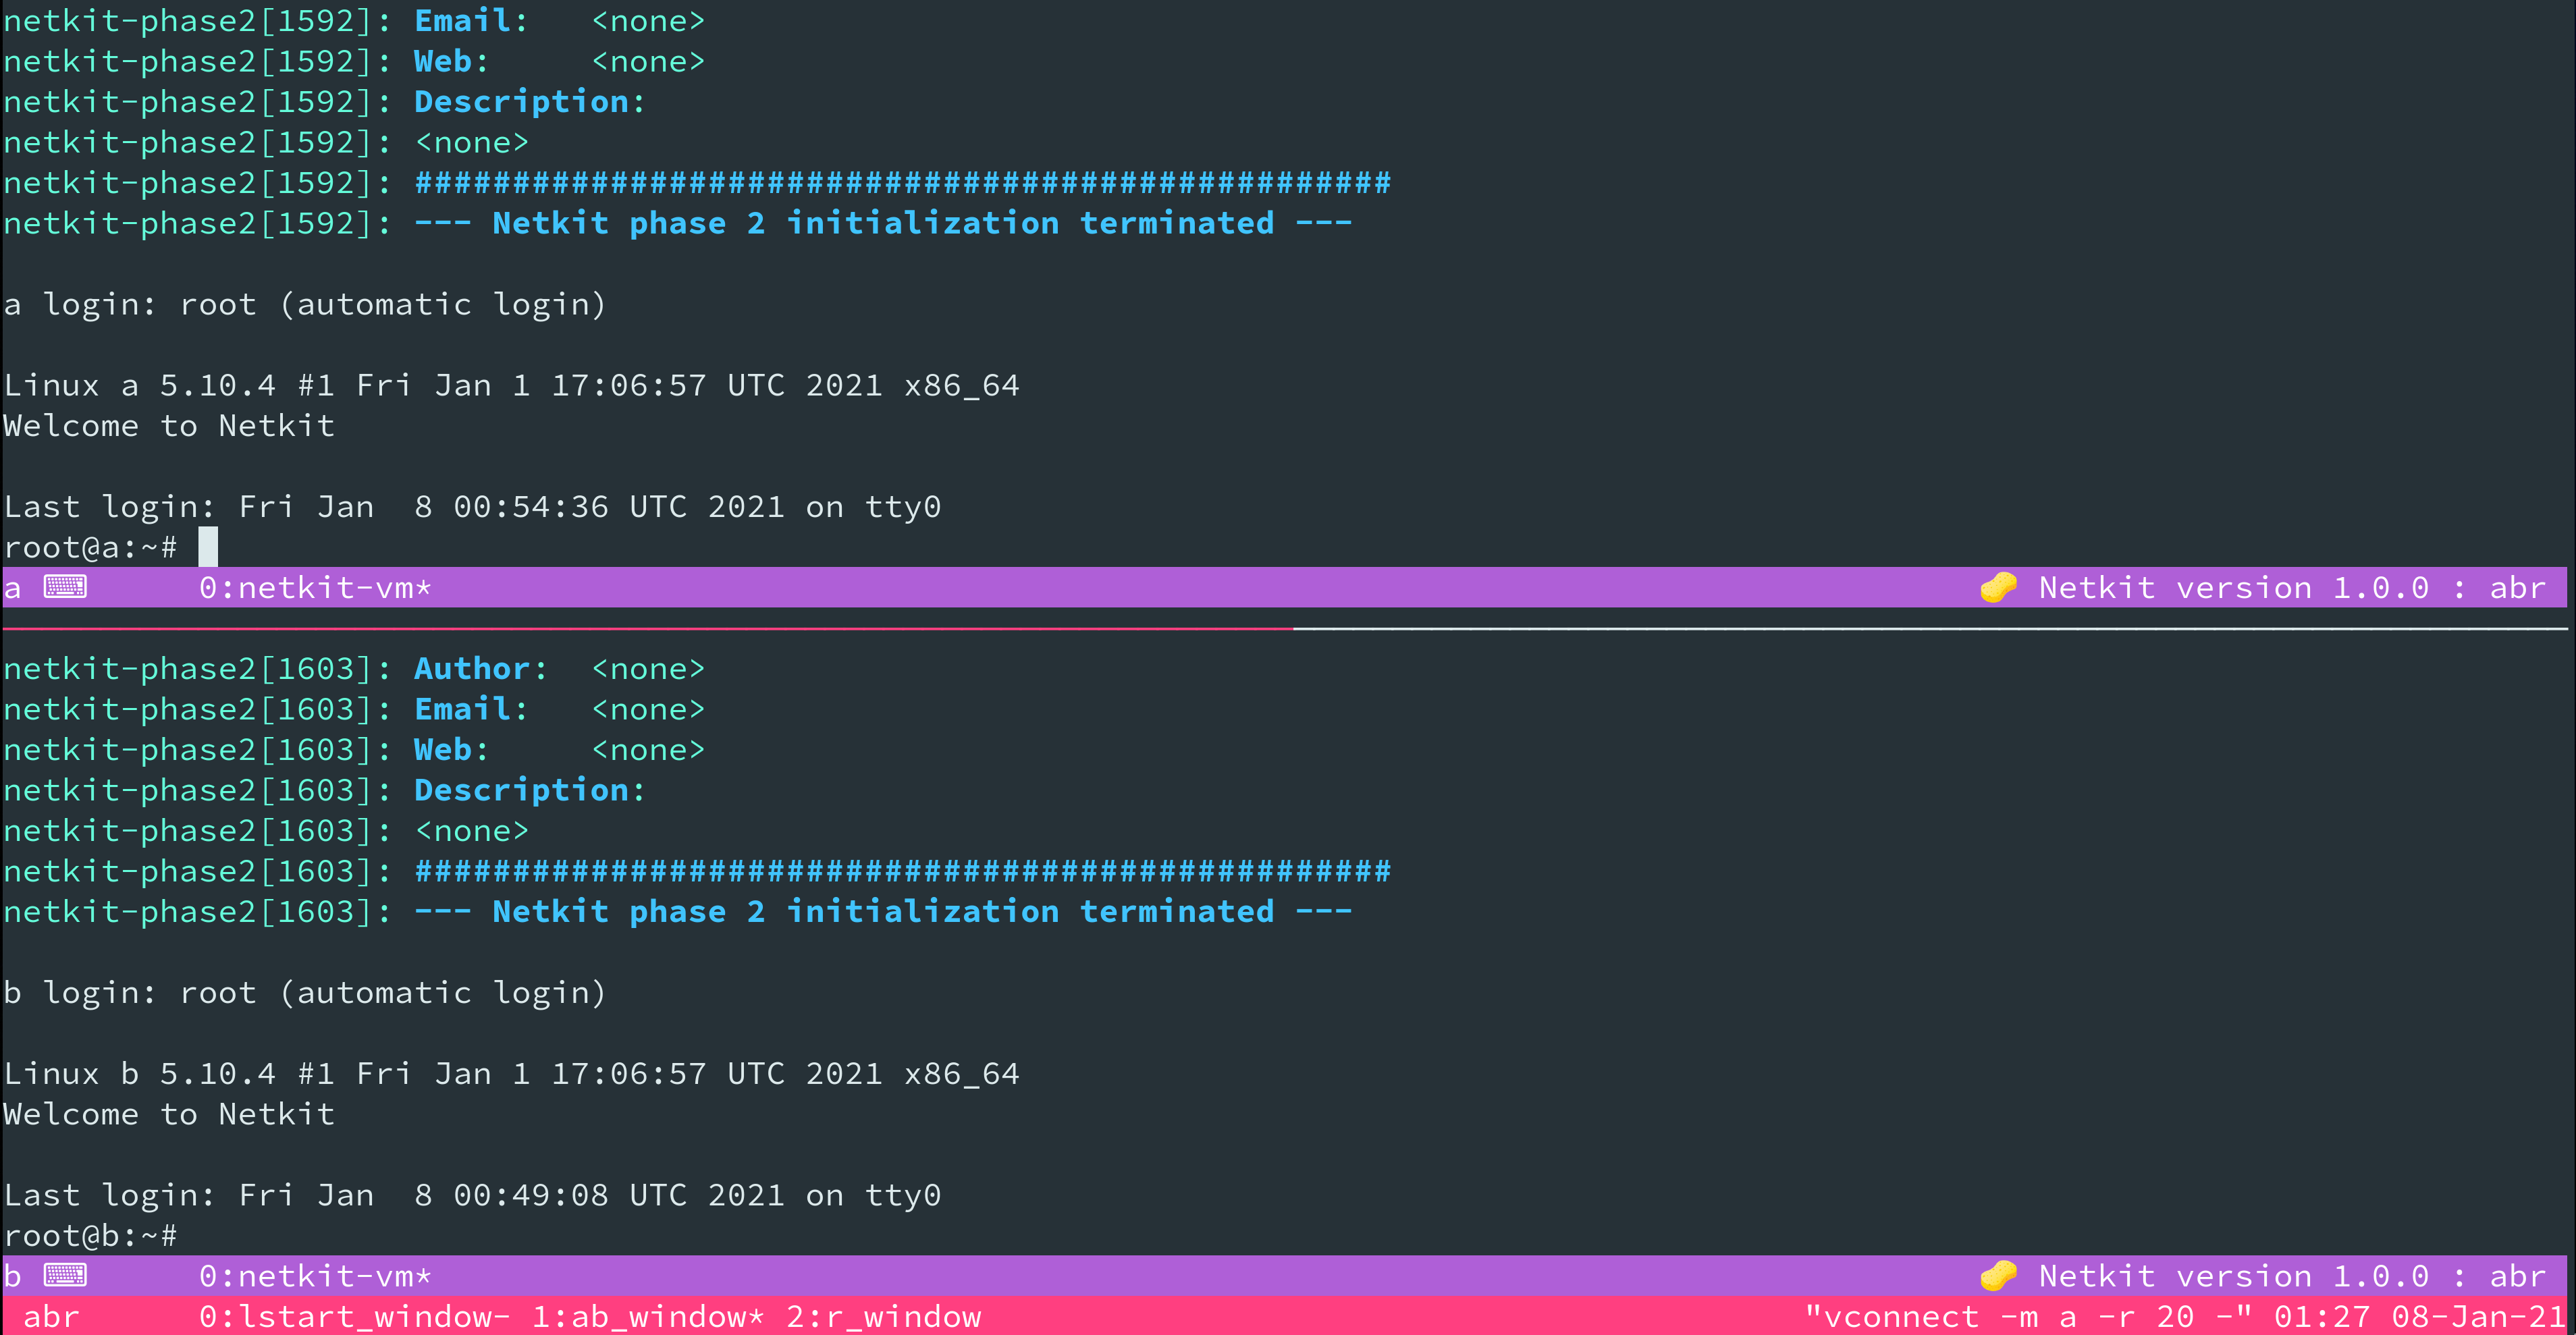
We can add the following to the list of windows:
This will add a window named 'ab_window', with two panes, one for machine a and one for b. It will also add a window named 'r_window' with one pane - for machine r.
It attempts to connect to the machines by running vconnect in the panes, with the options to retry every 3 seconds for up to 20 attempts. This means you can run tmuxinator start abr and not worry about vconnect failing because it tries to connect before lstart has managed to start the machines.
note
If you are using lots of machines, remember that some of them could end up much longer than a minute from when lstart is run to when they are created, meaning vconnect will fail. You can either increase the retry count and interval for vconnect, or you can use vconnect manually when the machine has started.
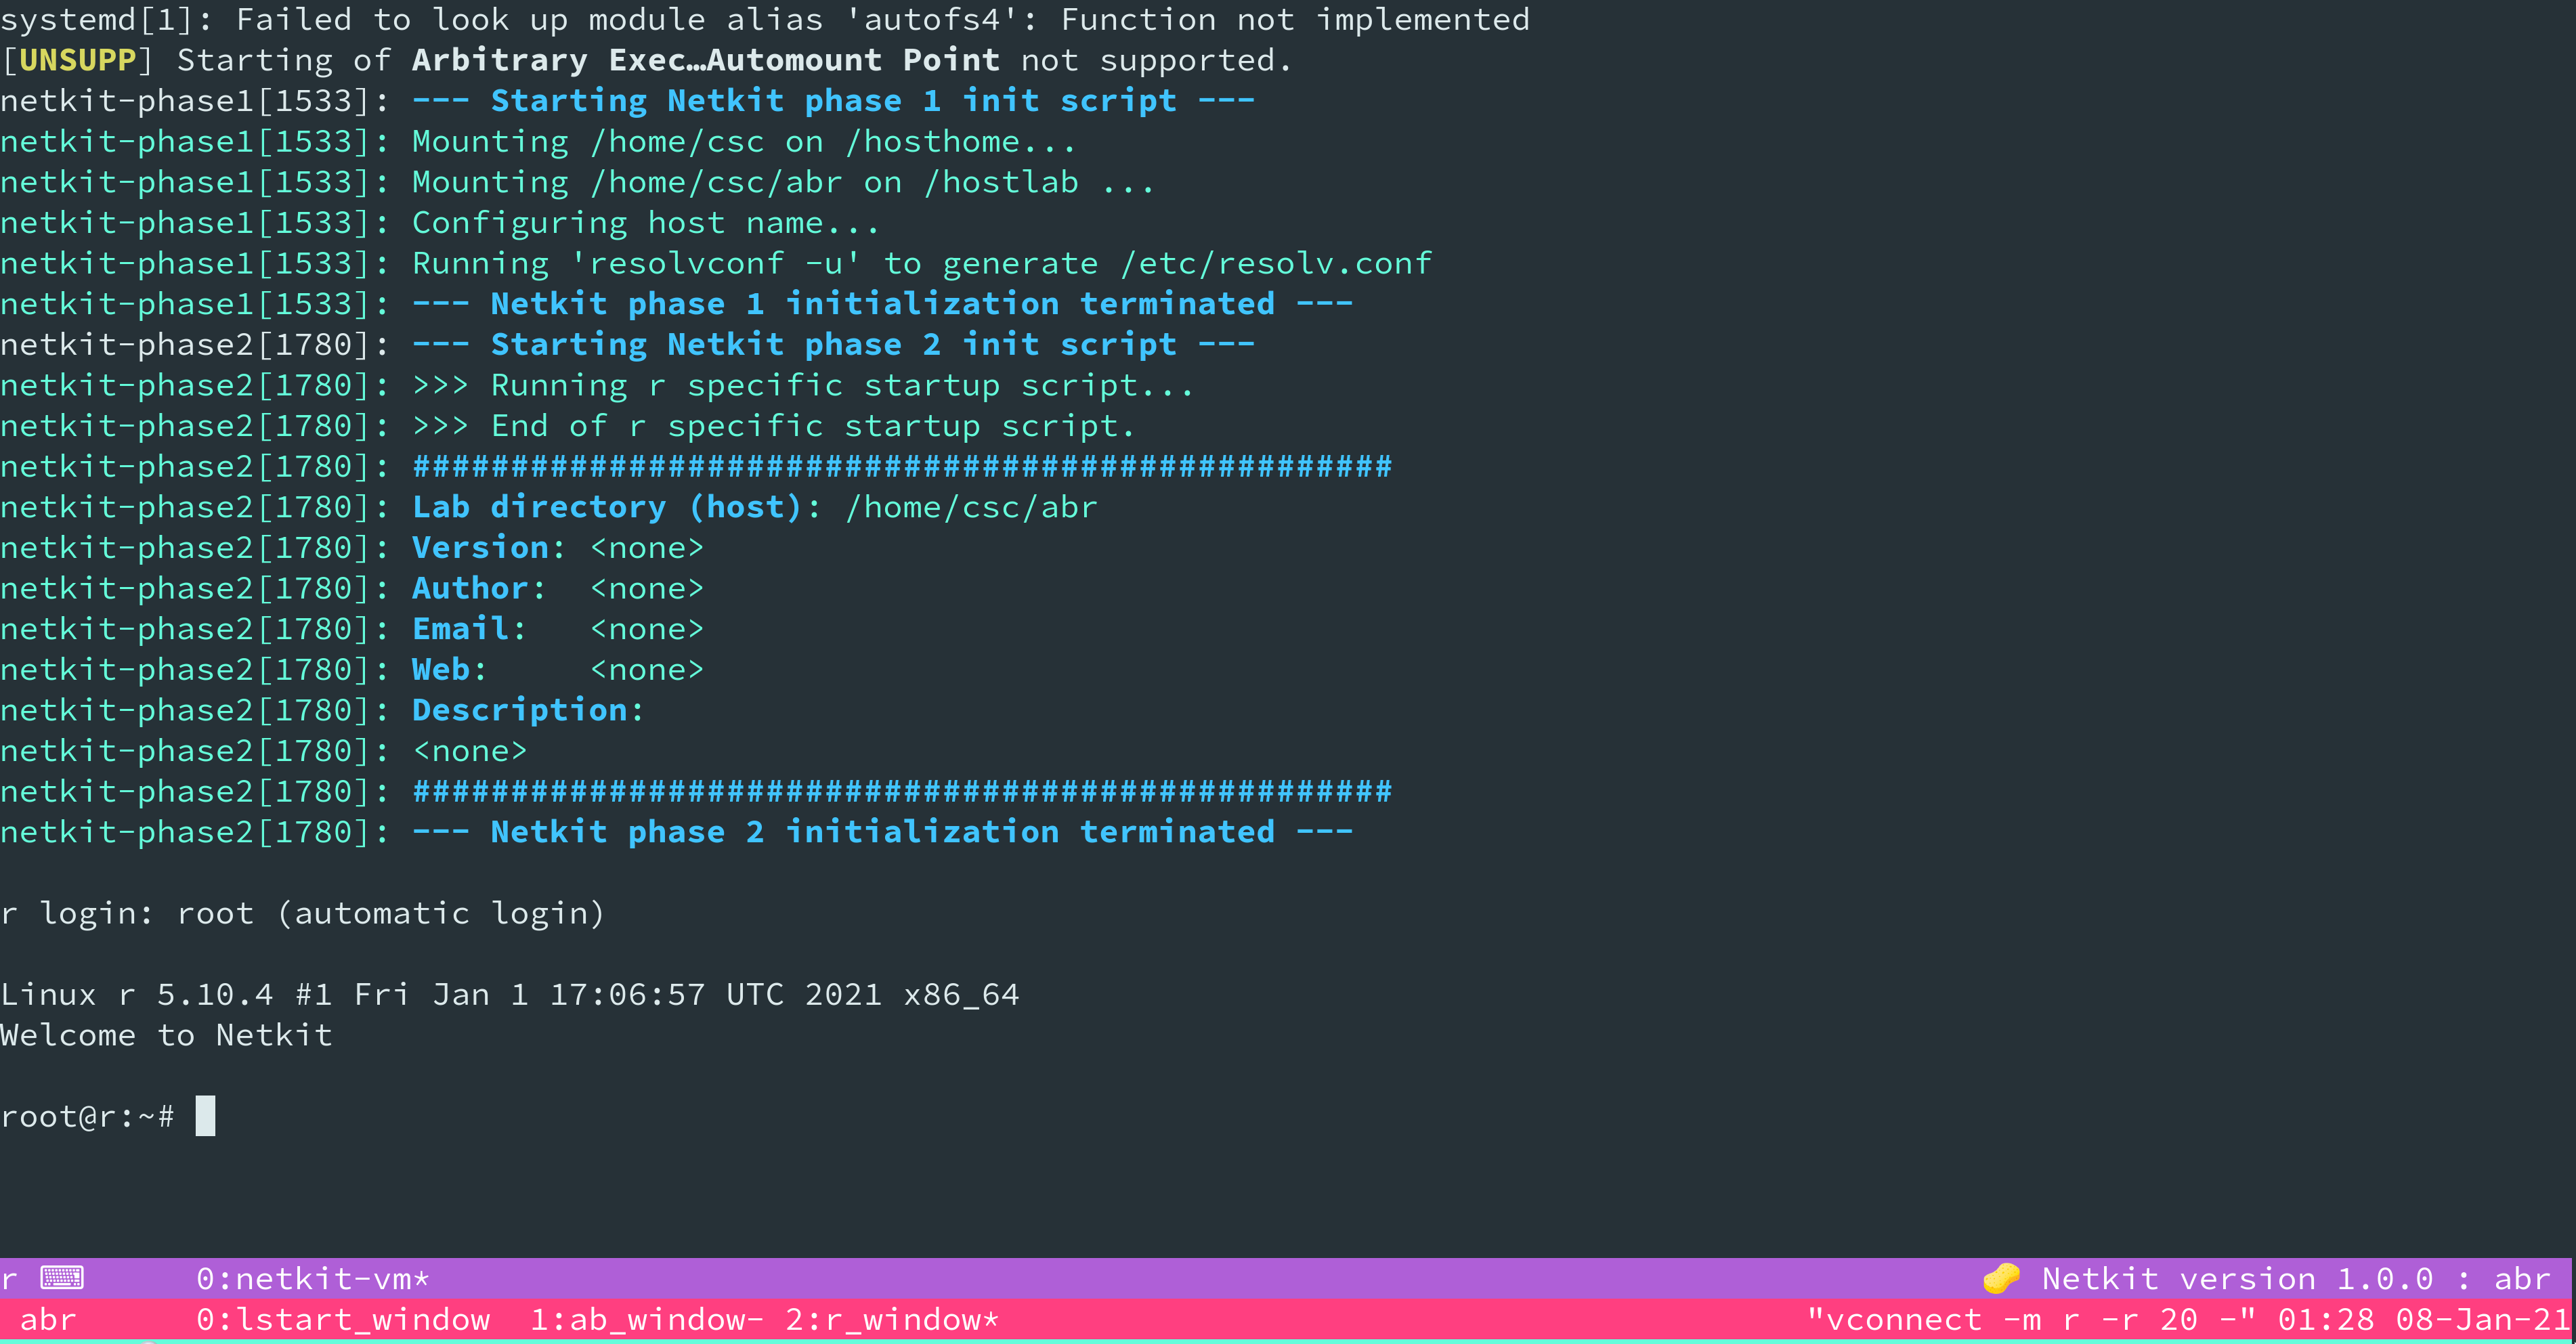
Let's try to start the lab now:
This should now start the lab, and if you cycle through the windows using leader then n, you'll see that there is a window for lstart (just a normal shell when lstart has finished running), a window with machines a and b, and a window with machine r.
The .tmuxinator.yml file as a whole now looks like this (with a few additions that I thought would be useful). You can use this as a template when creating tmuxinator labs.
Advanced#
Layouts#
There are 5 available layouts. Here are the descriptions from the tmux man pages:
To visualise this, there are some good diagrams and explanations here. You can additionally set the layout to something custom. The easiest way to make a custom layout is to start tmuxinator with one of the built in layouts, then manually resize and shuffle panes as you wish, then run tmux list-windows in that tmux session. You should then get a list of windows with their current layouts, which you can copy and use in your .tmuxinator.yml - as shown in this guide.
Changing the Startup Window and Pane#
By default, tmuxinator will attach you to the first pane of the first window. You can change that with
This example would connect you to the pane for machine b when you run tmuxinator start abr.
Nesting Sessions#
You need to remember when you nest sessions, that the outer session will intercept key presses first, and process them before they are passed to the next inner layer. This means if you had the same leader key for an outer session and an inner session, you would have to hit the leader key twice in a row to send commands to the inner session. This can get very annoying, so it is recommended to use a different leader key for each layer of nesting. Using tmuxinator with netkit will give you at least two layers - as you have the main session - created with tmuxinator, which has panes that are attached to sessions which are created for the Netkit machines.
By default, the netkit machine sessions will use a leader key of ctrl + d. If you use the same leader key in your tmux config, this will conflict and it is recommended to change it! If you haven't changed your tmux config , the leader key will be ctrl + b - so you don't need to worry about this.
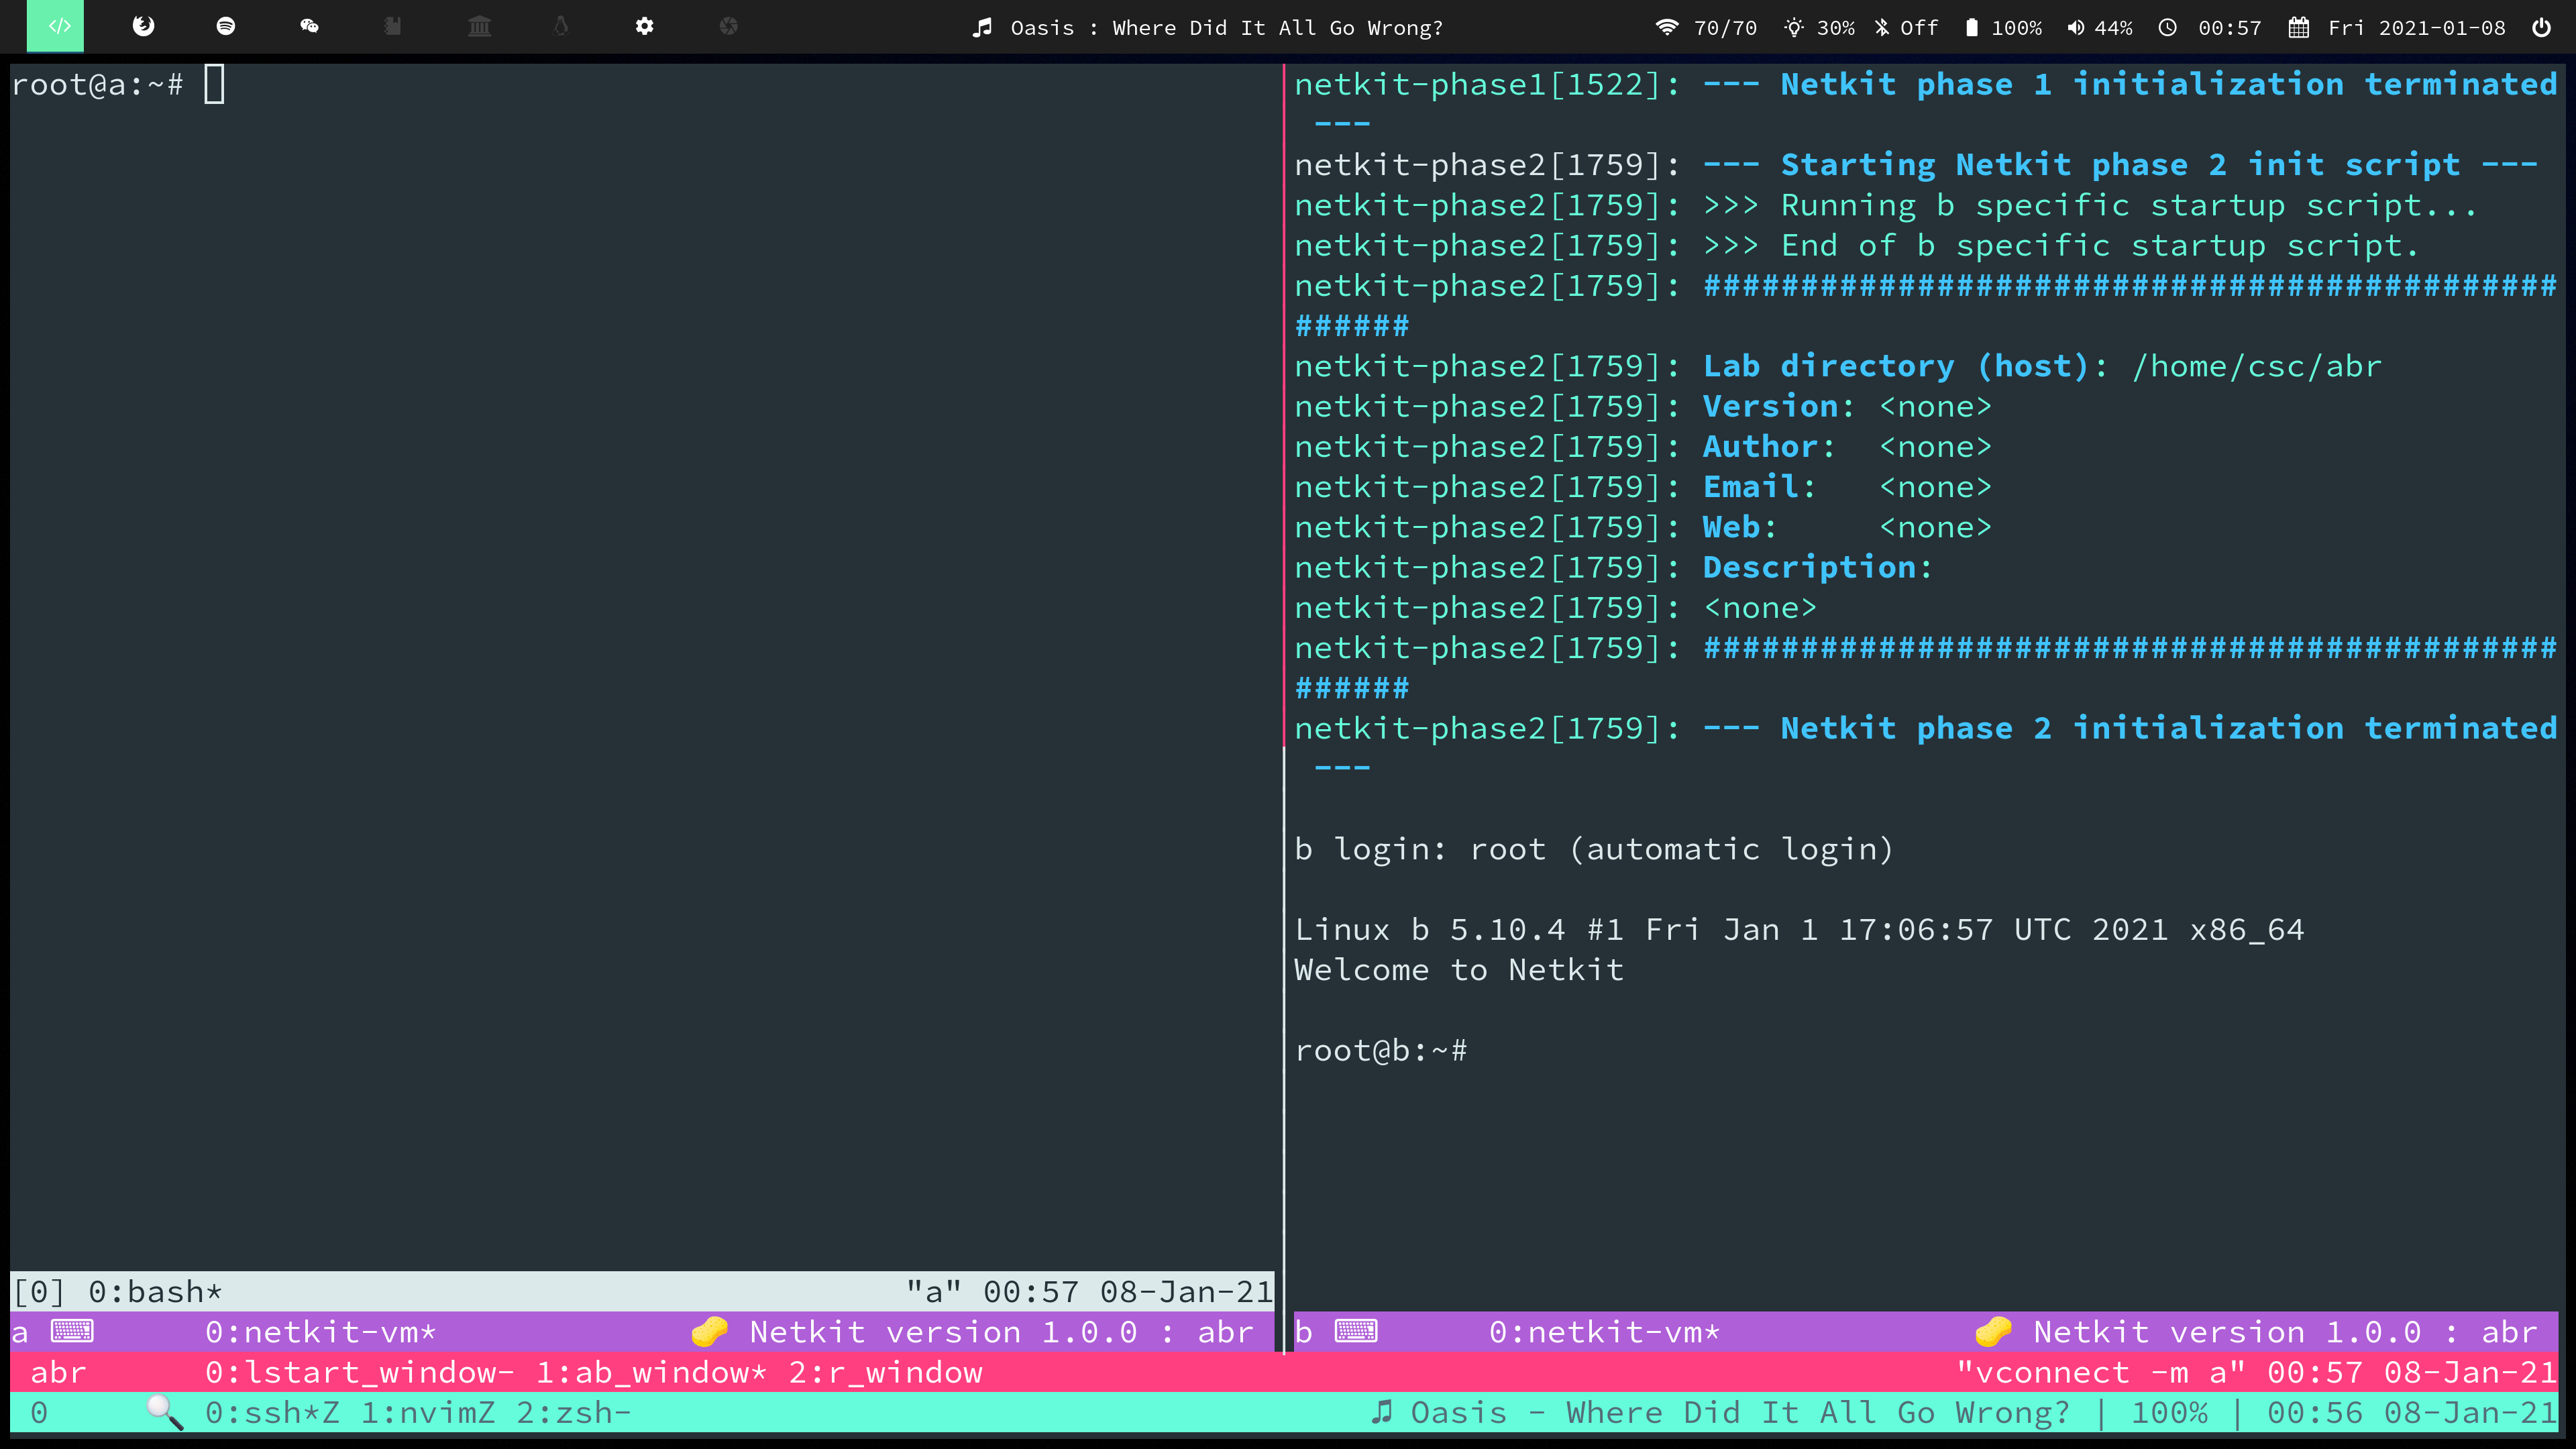
In theory you can nest multiple layers of sessions - for example here I have a tmux session on my host, with a pane SSHd into an Ubuntu VM, which has a tmux session started by tmuxinator. The tmuxinator session is attached to netkit machine sessions, and one of the netkit machines (a) has its own tmux session open. In general it's recommended to keep it simple, especially if you are starting out with tmux, but if you want to try more complex sessions, make sure you use different leader keys for each layer!
Extra#
For more info on using tmuxinator, the readme on their GitHub repo here contains documentation. Tmuxinator is quite simple so there isn't much more to cover. If you want to increase your productivity I would suggest learning more about tmux. Here are some resources for learning more about tmux:

